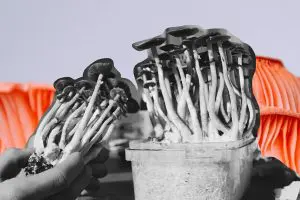

Spores are a significant topic in introductory mushroom cultivation, including how to obtain them, store them, and how to deliver them to the substrate upon which you are going to grow your mushrooms. After sourcing a spore print, or making one yourself, the next step is learning how to make a spore syringe.
Robert Mcpherson, a.k.a. Professor Fanaticus, the author of the magic mushroom grow guide called “The PF TEK,” claimed to be the first person to sell spores syringes. He started selling them in 1991, advertising his business “Psylocybe Fanaticus” through High Times Magazine (I bought my first High Times magazine in 1991 and I still remember those adverts!).
Spore syringes are now ubiquitous, and while they do not store spores as well as a spore print, they are good for beginners in the initial stages of learning about mushroom cultivation. They are essential for both the PF Tek and the Spiderman Tek—two different kinds of mushroom cultivation methodologies—but can also be used to add spores to a variety of substrates (grains, cardboard, or wood chips, depending on species) or for applying spores to agar.
How to Make a Spore Syringe
The process of making spore syringes is relatively simple. The important thing is that you want to prepare them in a space that is as clean as possible: Do everything you can to minimize contamination from other fungi spores or bacteria. Contamination is something even “agar wizards” struggle with, so being clean is vital if you want to save yourself or others a lot of headaches—especially if you decide to share or swap spore syringes. Many a cultivator will share stories of contamination issues within mason jars or on agar plates resulting from unclean prints or syringes!
As introductory cultivation techniques for shrooms, the PF Tek and the Spiderman Tek are hard to beat. Both methods are based around being able to apply hydrated spores to a substrate via a syringe. The creation of the PF Tek allowed a level of cultivation that was difficult to achieve prior to its introduction—rather than working with the process of germinating spores on agar, selecting the strongest mycelium, then moving it to new agar plates, then adding to grains… all of which can be a long and uncertain process for beginners.
Read: How to Make a Spore Print
Syringes can be obtained from pharmacies, but my advice is to source Luer-Lok syringes. These have a screw-like fitting into which you can twist the needle or a protective cap for easier transportation. These can be obtained from eBay or medical suppliers quite easily. I find it is best to use a larger size, such as the 10ml size syringes, which work well. You can source 2ml and 5ml versions, but if you use the whole print, it is best to go the 10 mL size.
How to Grow Shrooms Bundle
Take Both of Our Courses and Save $90!
Before we start, it is essential to point out that working with syringes requires a little bit of occupational health and safety. They are very sharp. Always recap when not in use—not so much to protect the contents of the syringe, but to protect you, your housemates, or family.

To make a spore syringe, you will need the following:
- food safe gloves
- an empty syringe (Luer-Lok preferred)
- 70% alcohol, or 70/30 methylated spirits and water
- sterile water
- a spore print
- torch lighter/gas-burner
- scalpel
- a pair of tweezers
- aluminum foil
- a pressure cooker
As already mentioned, make your spore syringes in sterile conditions. Clean up your working area, or your still air box really well, using either 70% alcohol or 70/30 methylated spirits and water. Make sure there is no air movement, and let the people you share your space with know what you are doing so they don’t rush into the room and disturb the air. Try to work efficiently and quickly, with a steady hand when making a spore syringe. Maybe do a couple of practice runs first.
A spore syringe contains sterile water containing hydrated spores, which we refer to as a spore solution. To obtain sterile water, you can use a pressure cooker (PC) to sterilize your water. If you don’t have a pressure cooker, you can boil your water in a microwave, or purchase sterile water ampoules from a pharmacy.
A pressure cooker is preferred, since it is easy to run, and sterilizing water takes no more than 20 minutes at 15 psi. Use a glass jar covered with a piece of aluminum foil. Fill the jar with water and place it in the pressure cooker. Apply heat and as per the instructions, and when the pressure has reached 15 psi, lower the temperature. Let it sit at 15 psi for about 20 minutes; then you can then turn off the heat and let it cool completely. Hot water destroys spores, so make sure the water is at least lukewarm before using. Ideally, let the water cool over several hours.
It is best to do the following in a Still Air Box (SAB) to minimize air movement. Still Air Boxes are easy to make, so I include brief instruction on construction.
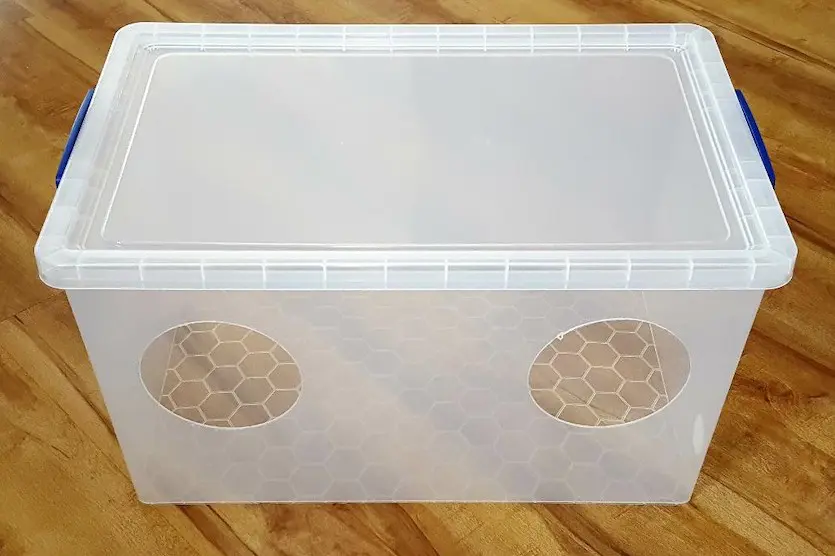
Most SAB’s are made from large clear plastic storage boxes (my first SAB was a cardboard box with a cling wrap window!) with two holes cut for armholes. The still air box can be cleaned with alcohol, and allows work with minimal air movement (limiting air movement, limits the possibility of contamination). The plastic in most plastic storage tubs is brittle, so rather than trying to cut holes, heat a medium-sized tin can, a peach tin, or large tinned tomato tin, till it is hot and then being careful not to burn yourself cut two holes in the plastic, where you think your arms would feel most comfortable. The hot tin should cut the plastic effortlessly (best to do this outside).
Read: A Mushroom Cultivation Cheat Sheet for City Dwellers
Wearing food safe gloves clean the inside the Still Air Box with the 70% alcohol or 70/30 methylated spirits and water. Place everything you are going to use inside the Still Air Box, all within easy reach, as movement can tend to be cumbersome.

The next step is to sterilize your tools. The scalpel and tweezers can be sterilized by heating them with a flame lighter or gas-burner. Heat them till they start to glow red and let them completely cool before using. Do the flaming of the tools outside the Still Air Box, as you do not want to risk the alcohol fumes catching fire. As they cool, you can place them in the box.
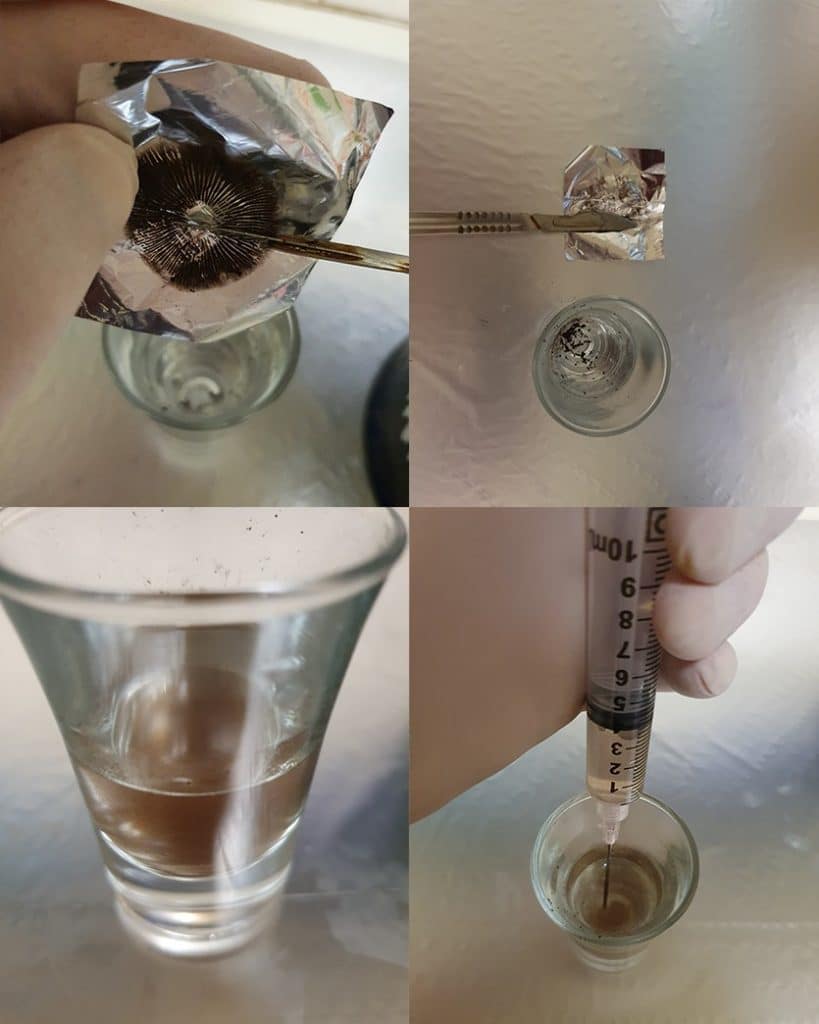
There are a couple of techniques you can use to make the spore syringe. The most common method is to transfer 10 mL of the sterile water to a shot glass, or a small glass cup, then while gently holding the spore print, use a scalpel to scrape the spores into the water. Depending on how many spores syringes you would like to prepare, you can scrape accordingly.
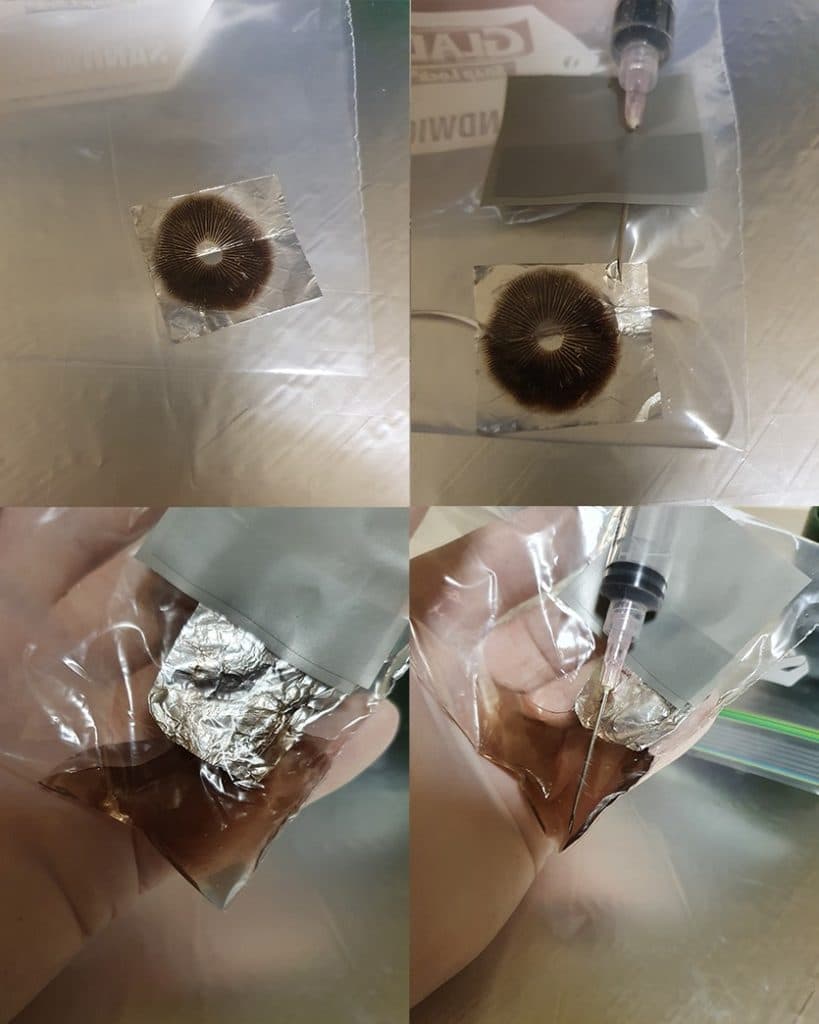
An alternative method is to use self-seal bags. The self-seal bags are sterile inside as a result of industrial manufacture processes. Place the print, or part of the print, carefully into a self-seal bag, pushing it to one of the corners, and while squeezing out the air, seal the bag. Inject 10 mL of sterile water into the corner with the print, then using your thumb and forefinger, wash the spores off the foil into the water, then draw the water up. This method can be done outside a Still Air Box, but to help minimize air intake, you can use electrical tape to minimize air movement as you remove the needle.
Read: How to Harvest Mushrooms
As soon as you have drawn up the spore solution cap the needle. It is not a good idea to use immediately as the spores need time to hydrate. This will take approximately 24 hours, but two to three days is even better. If you wish to store the syringe, they can be kept in the fridge at 2-4°C for about two to six months. Store them in an airtight zip baggie, as fridges are not the cleanest places!
A quick summary of the process:
- Clean down all the surfaces or Still Air Box
- Sterilize the water
- Start with a clean (ideally) sterile print
- Remove the spore print from the foil envelope
- Place the print careful in a self-seal bag and seal
- Inject sterile water
- Using thumb and forefinger wash spores in water
- Draw up the spore solution using the syringe
- Cap the needle
- Voila—spore syringe!
Beyond Psilocybin Mushroom Spores and Basic Spore Syringe Creation
If you use the whole print you can then dilute across more syringes. Make sure you shake the syringe really well to distribute the spores, then to 9 mL inject 1 mL of spore solution. This can be done several times. This dilution can help minimise contamination; by diluting the spores, potential contaminants are diluted. This is particularly useful if using a wild print or a potentially unclean print.
If the print you used to make the spore syringe is from a clean indoor grow, you could expect a high degree of cleanliness. Also, most bought syringes should come from a sterile environment. You could inject the spores straight into a nutrient broth to make a liquid culture using spores, and in the process skipping the steps involving agar plates. Or you can inject straight onto grains or other substrates and expect minimal contamination as long as the rest of your lab technique is clean.
Best of luck!
Appendix: Review of How to Make a Spore Print
So the steps can be summarised as:
- Clean everything with alcohol/methylated spirits and let dry.
- Lay flat a piece of clean aluminum foil cut to size.
- Remove the cap from the mushroom, cutting with a sterile blade as close to the cap as possible. Use the torch lighter to flame the edge of the blade before use.
- Place the cap on the foil gills facing down.
- Cover the cap and foil with a cup or bowl.
- Leave to sit 6 to 12 hours for a good dark print.
- Lift cup/bowl and carefully remove the mushroom cap.
- Cover the print with the cup/bowl, and leave for another 6 to 12 hours, or until dry.
- Fold and store, use the foil envelope method (described next).
- Date and label the foil pouch.
Interested in having a psychedelic experience, but don't know where to start? Get our definitive guide on trusted legal retreat centers, clinical trials, therapists, and more.
We started DoubleBlind two years ago at a time when even the largest magazines and media companies were cutting staff and going out of business. At the time we made a commitment: we will never have a paywall, we will never rely on advertisers we don’t believe in to fund our reporting, and we will always be accessible via email and social media to support people for free on their journeys with plant medicines.
To help us do this, if you feel called and can afford it, we ask you to consider becoming a monthly member and supporting our work. In exchange, you'll receive a subscription to our print magazine, monthly calls with leading psychedelic experts, access to our psychedelic community, and much more.